Friday, August 31, 2012

chicken with soya sauce and type of yellow French beans !

I have discovered another culinary expression with "french" in it !!!

Is this the real name of those beans ?  Type of yellow french beans ??
Or do I have to change my dictionary for a real one ...
Because, reading the translation, I had the vision of a man, in front of his page, with a millions words to translate, scratching his head, exasperated, and thinking :
" ... How the hell am I going to translate this expression "Haricots beurre" ??!!... Well, let's go for "a type of yellow french beans", that will be ok ...!"

We call them "Haricots beurre", which can be translated by "butter beans", because they're yellow like butter.

Anyway, this is the french touch in this recipe, because as you can read, soya is not really french !

Here's a recipe that all my family likes. And I'm sure you know how much it is a challenge ;)


You'll need :
  • 2 cloves of garlic
  • 1 onion
  • 6 chicken scallop
  • Soya sauce (I take the sugared one, you use the one you like)
  • Olive oil
  • 1 bunch of Parsley
  • A little bit of butter
  • And of course, a type of yellow french beans ... Frozen... Because, we don't have time to unshelled them !


Step 1 :
Cook the beans the way you use to : let them boil or steamed, during the time written on the pack. I always use steam to cook vegetables.


Step 2 :
During the meantime, cut your onion and one clove of garlic :


Step 3 :
Make them brown. Don't forget : add salt and low fire.
Usually, garlic cooks faster than onions. So, it's better to cook onion first, and pour garlic in second.
But I didn't get time, yesterday !
I lived dangerously, and add the garlic in the same time !


Here what happens, if we don't respect the holy rules of culinary world ... 
But it taste the same, so I assume ;)


Step 4 :
Cut you chicken in pieces and add in in the pan, when garlic and onions are brown.


Let it brown too. You fire must be between high and middle. Stir often.


Step 5 : When it's done, pour 60 - 65 ml of soya sauce.
This just an indication that I give. In reality, you add as much liquid as you like.
As it's sugared, my children love it, of course.


Stir to coat the chicken with the soya.


Step 6 : Cut the half of parsley, and the totality of fire ! I never cook the parsley, I use it fresh.


Step 7 :
Cut your second clove of garlic.


Step 8 :
Your beans must be boiled or steamed, now.
Take another large pan, pour one tablespoon of olive oil and a knob of butter (oil will avoid the butter to burn), and make the garlic brown.


Step 9 :
Add your beans, and let them brown just a little bit !! Or more, if you prefer, who cares, this is YOUR dish !
In this recipe,  all is about BROWN ! ;)
But all is better when it's brown. Even beans ... MOST OF ALL, beans ... !


Add the rest of parsley.


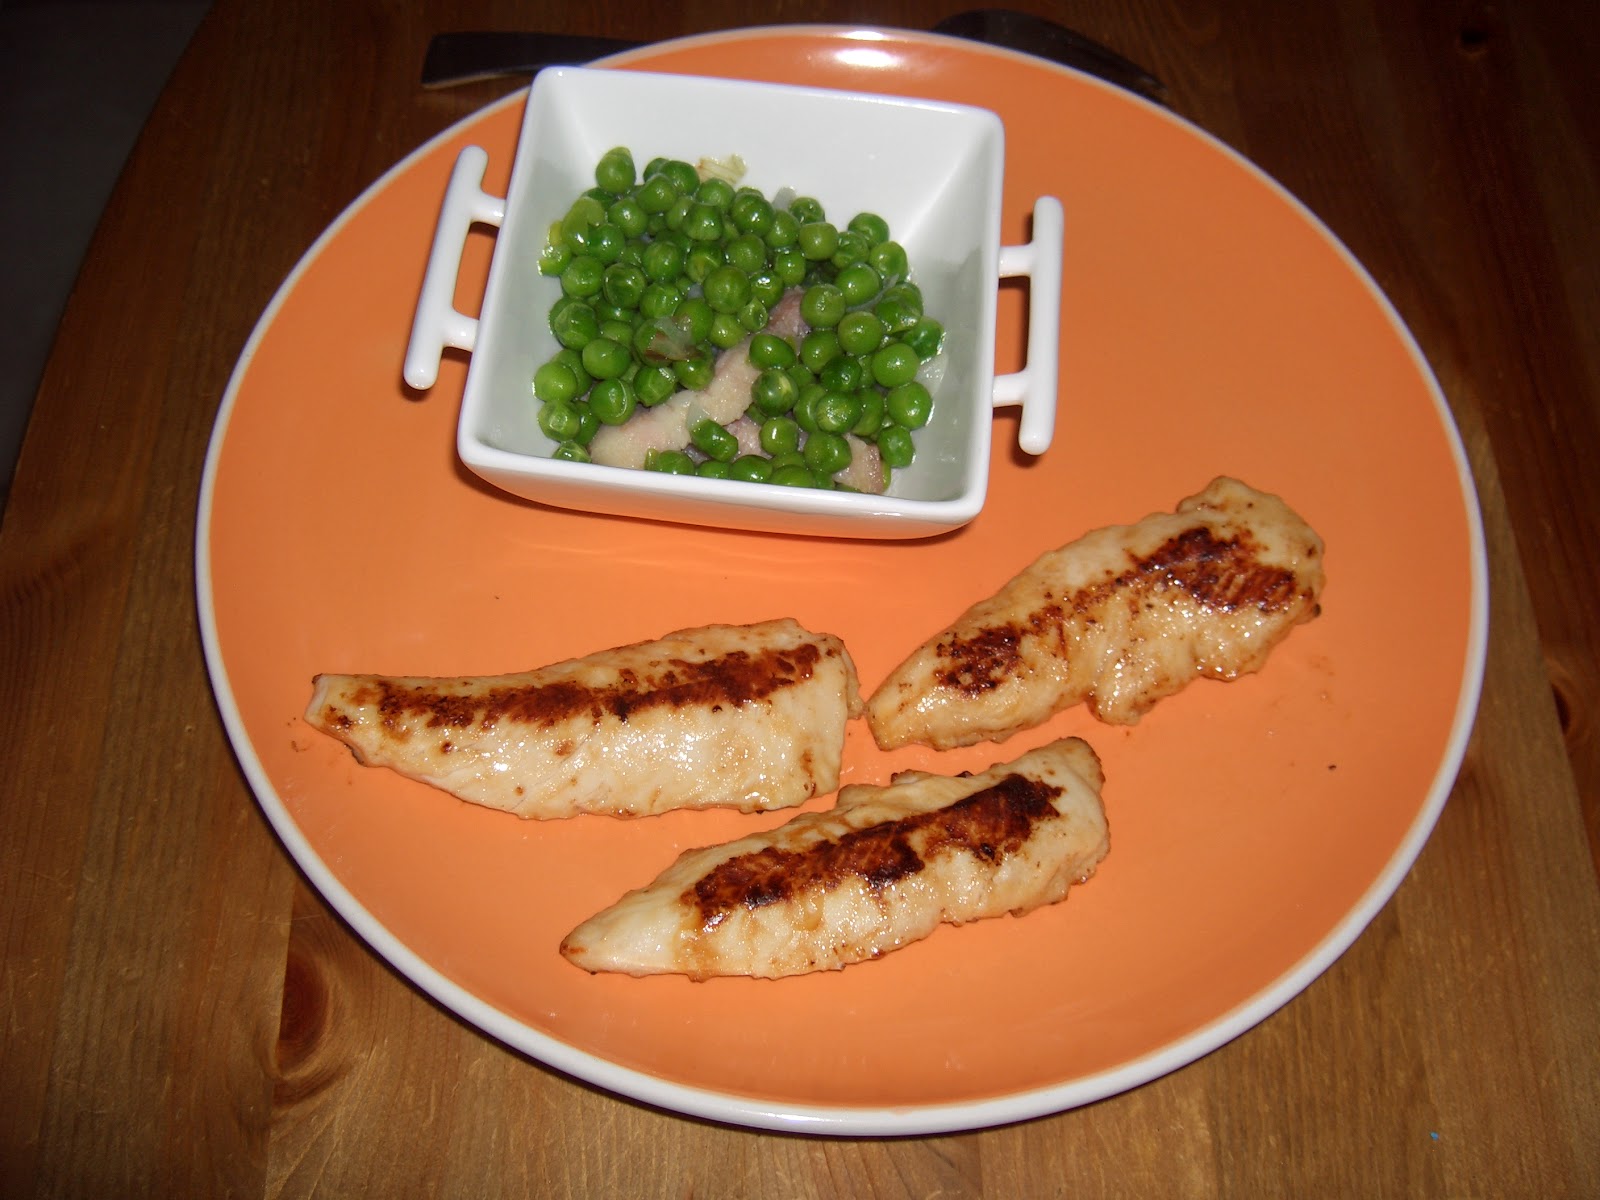
Finally, eat it. This is a wonderful caramelized dish.
You can eat with rice too, of course. But, generally, I always try to balance my dishes.


I hope you'll like it  !


Wednesday, August 29, 2012

My version of french peas.

I began reading american blogs 4 years ago.
And I discovered that there were a lot of culinary expressions with "french" : french toast, french fries, french dip sandwich (I discovered it very recently - 1 day ago !) ... and french peas.

French toast, in french, is called "pain perdu", that we could literally translate by "lost bread". It doesn't mean that we loose the bread, didn't know where it was ... ;)
At the origin, it was just a way to use the yesterdays' bread, instead of throwing it in basket.

French fries is funnier : In reality, they should be called "Belgian fries".
During the second war world, when americans came to save french people, disembarking in Normandy, they had to go to Germany. So they crossed Belgium. As in Belgium, people speak french too, american young boys didn't know it was not the same country.
When they discovered fried potatoes (created by Belgians), naturally, they called them French fries ;)
Sorry for our belgians friends, I'm trying to restore their creation !

French Dip sandwich ... I totally ignore why american people call it like that ;)
I discovered this in the the girl who ate everything' blog, yesterday !
If someone can explain to me, I'll be happy to impress people, the next time I'll have a dinner... :-D

So, french peas ... We call it "petits pois à la française".

I say "it is my version", because, normally, you have to use lettuce with. But, to say the truth, cooked lettuce don't make my mouth water ...

So, I do almost the same, without the green salad. If you want to taste, you can do it ! Just add some lettuce slides crude, when you'll add peas.

You'll need :

  • 500 or 600 grammes of frozen garden peas
  • 1 slide of bacon
  • 4 white small onions (if you don't have, you can use regular onion)
  • 1 cup of chicken stock
  • Butter and olive oil.


Step 1 :
In a large pan, let melt a knob of butter with 2 tablespoon of olive oil. Oil will avoid butter to get burned.


Step 2 :
Cut the onions in small slides and make them cook until they become golden.
If you don't want to see your onions burn, 2 things to remember :

  1. You have to salt them. 
  2. And most important : low fire ... It's a little bit longer for them to gold, but you won't make them burn.


Step 3 :
In the meantime, cut the bacon.


Step 4 :
When your onion is golden, add the bacon. Make it cook a little while (5 minutes), except if you like it a little bit more grilled.


Step 5 :
Pour the chicken stock cup. I use powder chicken stock. But take the one you use to cook. Even if you prefer vegetable stock, no problem.
Better organic one, of course. I don't have it ...
Don't forget : the important is to have pleasure and to cook what you like.


Step 6 :
Pour it in the pan, with frozen peas. Let it cook for 15 minutes, with a lid, on a low fire.


After 15 minutes, take off the lid and let the peas cook 5 minutes more, to make the water evaporated.


It's done !
Here's my daughter's plate.


Tuesday, August 28, 2012

Cucumber salad

My son is selective in what he eats.

Of course, french fries, rice or pasta will always have success. But it's always a challenge to me to make him taste vegetables.

He likes cucumber. So I use to cook this fast recipe.

You'll need :

  • Cucumber
  • Heavy cream (or semi heavy, if you prefer)
  • 1 clove of garlic
  • Black olives, 
  • Salt and pepper.

Step 1 :
Cut your cucumber (I like to cut vegetables in a very geometric form, don't ask me why !)


Step 2 : 
Pour garlic, that you'll have crushed with a garlic press (or cut in small pieces).
After this salad, of course, don't open the mouth, you could kill a buffalo ! 
But you'll notice that, in a lot of Provençals recipes, there's garlic...
... We don't fear the buffalos at all ! 


 Add salt, pepper and black olives....


...The heavy cream.


And mix together. 


Cucumber is very light, only water. So you can use heavy cream without complex ! 


Monday, August 27, 2012

Tuna and Philadelphia.

This recipe is SO simple that I'm almost ashamed to post it !

I serve it when I make tapenade and anchoïade, with bread and crudités.

In france, I use a cheese called "Saint Moret", but I suppose you can easily use philadelphia.

So, here what you'll need :

  • 300 grammes of philadelphia
  • 400 grammes of tuna in can
  • A fork ...


Step 1 :
Pour the cheese in a bowl with tuna.


Step 2 : 
Come off the tuna with the fork and mix it with the cheese...


...until it's combined.


Step 3 : Eat it !


This is so easy, don't you think ?

But you'll be surprised how much it's good. 
When we begin to eat that, we can't stop until the plate is empty.

We used to eat it with bread and crudités or just with a spoon ... !

You can also add (it's up to your choices) : lemon, garlic, basil, chives...etc ...

But, in my family, we like it this way ;)


Sunday, August 26, 2012

Caramel au beurre salé (salted butter caramel)

Tomorrow, I go back to work ...

To work don't bother me. But to have to obey to a CLOCK makes me crazy ! I love to be totally free time.
Tomorrow, my clock will ring at 6.15 AM, and once again, I will try to not throw it away by the window !

So tonight, I wanted to post the Anchoiade, do you remember ?...
Watching to my camera, to choose the pictures I would post, I had the bad surprise to find it empty ! All my pictures on anchoiade were erased !

So I decide to show you the dessert I made today, for a friends's diner : The salted butter caramel.
In where I live, we've got this expression : "une tuerie", which means "something to kill you ! something to die for !".

This recipe is a little bit more technical than all the others.
The important is to stay close to your saucepan. You can not leave the saucepan. You can not take your eyes off it.

But believe me : if I can do it, you can do it !

Here what you'll need :
  • 160 grammes of white sugar
  • 80 grammes of salted butter
  • 20 cl of crème fraiche LIGHT... Yes, because we're going to eat a caramel, but we use LIGHT CREAM ! ... Don't ask me !


Step 1 :
Your cream must be very hot, to not stop the cooking of the caramel, when you'll add it to. So make it boil into the microwave for one 1 minute and 30 seconds. 


Step 2 :
Cut your butter in small pieces : 


Step 3 :
Put your sugar into a large pan, with high rims. 


Your fire must be just a little bit more than low. Middle, but not to hot.
Light the fire, baby !


And now, you have to remember : Never mix a caramel with utensils ! You just have to shake it.

Here what it's have to be done :


Little by little, your sugar will become golden :


And more golden. Keep on shaking, baby !


Be careful, DON'T LET IT BURN ! This is here that your concentration must be high level !
Because it can burn very quickly and all is rotten.


Step 4 :
When your caramel is more liquid and becomes more than golden but not brown, take it away from fire, and pour the cream in it, while you're whisking with energy.
Be careful too, as you will see in the video, the cream "jumps" ! And it's very hot, of course.

You'll have the chance to admire my messy kitchen ! I was a little bit overburdened ! 


Step 5 :
Add the butter, still whisking.


Step 6 :
You'll have small pieces of dark sugar, in your caramel.
On the lowest fire, keep on whisking more slowly, to make those sugar crystal be melted.


You won't make them all disappear. That's normal.

It's done, put it in a jar, keep it the fridge and eat it the way you like.


As it's still hot here, we ate it with vanilla ice cream. But in winter, I use to make it with apple crumble, for example.