Some days, you succeed all you try.
Every ingredients between your hand become gold.
Every perfume combine perfectly.
Some days, the Cooking God is in your kitchen, with you !
This day was not today, for me.
I don't know where was the Cooking God, today, but I can certify, he wasn't in MY kitchen !
Riddle : What is this ?

It was supposed to be like THIS :

www.lapopottedemanue.com
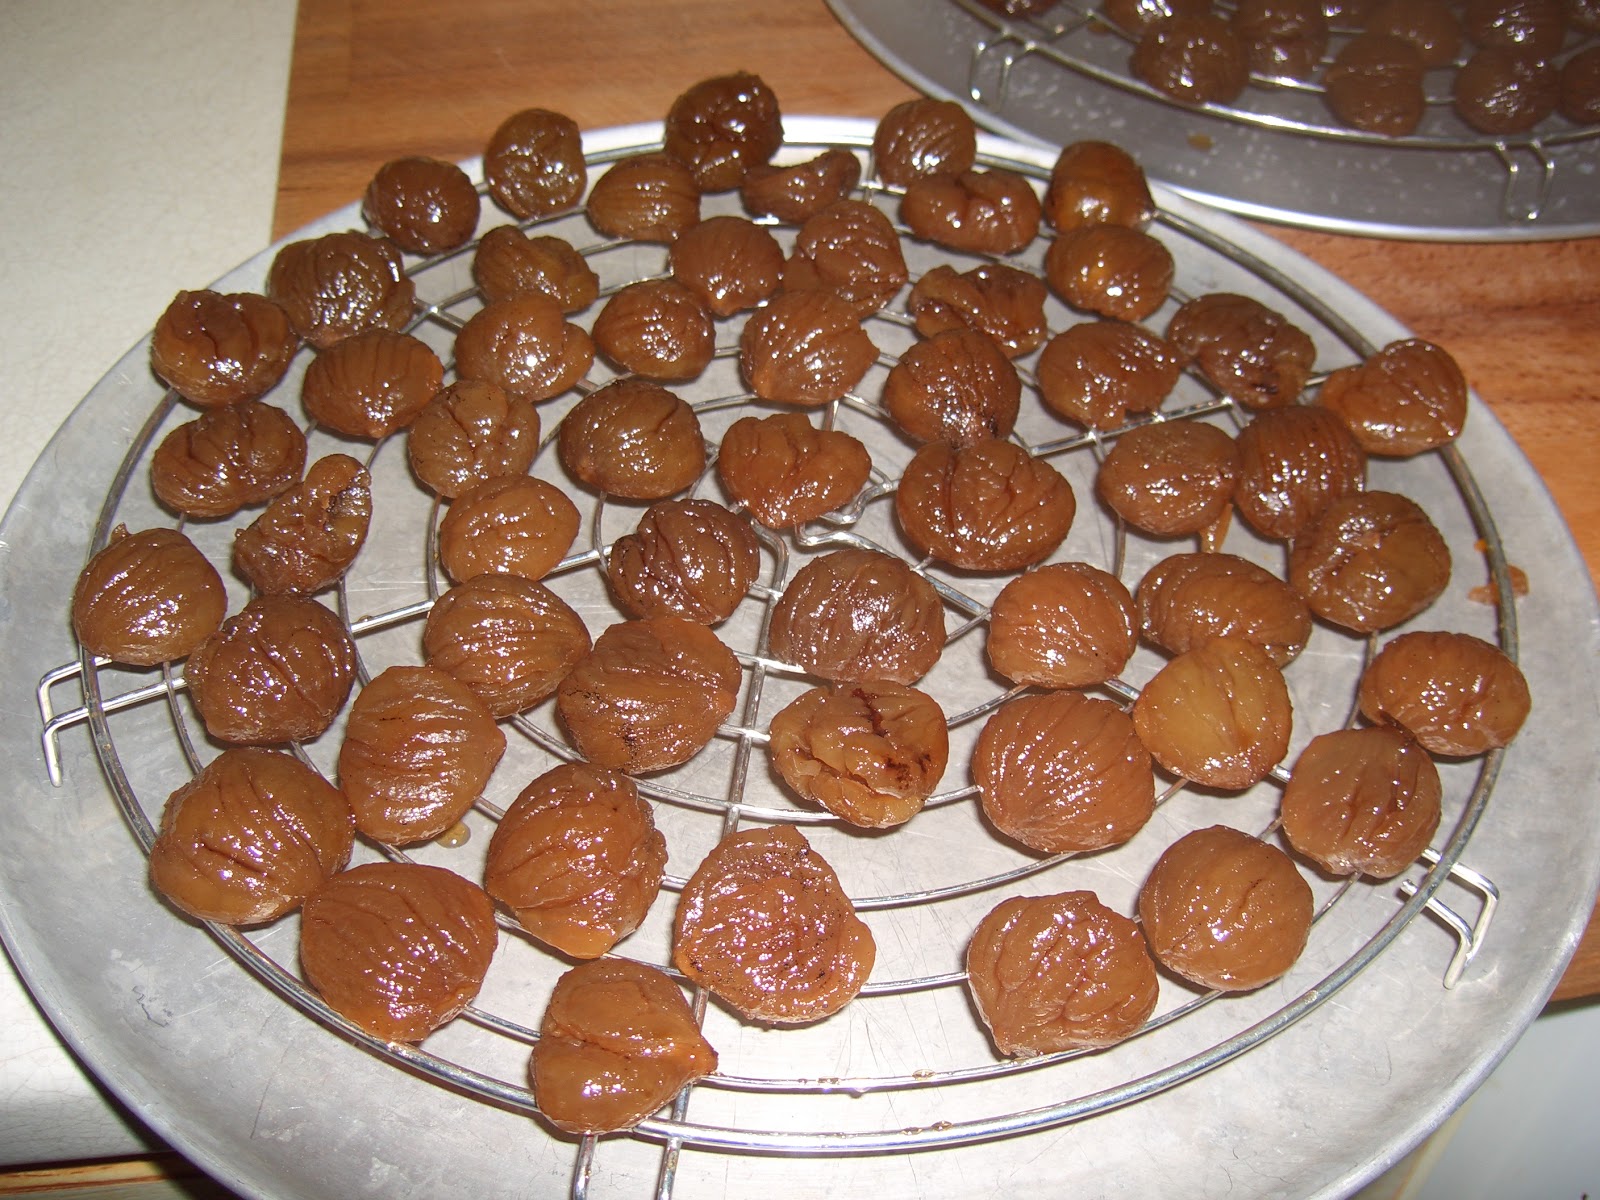
Finally, pitiful flat disc !
But as I didn't want to throw away my meringues disc, I've tried to find a solution and I remembered an old recipe I never dared to cook.
It was now or never !
Cooking God was not with me but there were one or two angels, because, I had whole cream in my fridge and chestnut spread in my kitchen cupboard.
I could try my recipe.
This must be baked the day before you want to eat them.
Here what you'll need, for 30 ruined tiny Christmas tree or 30 wonderful flat disc :
- 2 eggs whites
- 50 grammes of sugar
- 50 grammes of icing sugar
- One pinch of salt
- One vanilla pod (or one tablespoon of vanilla extract)
- Some decorations
- And something very important in theory : a piping bag.

For the garniture, you'll need :
- 200 grammes of chestnut spread
- 30 cl of heavy cream extra cold
- One tablespoon of icing sugar.

Your oven must be preheated at 90°C (190°F / Th 3).
Step 1 :
Open your vanilla pod and add the seeks to the two sugars.
If you use vanilla extract, don't add it at this step.
If you use vanilla extract, don't add it at this step.

Step 2 :
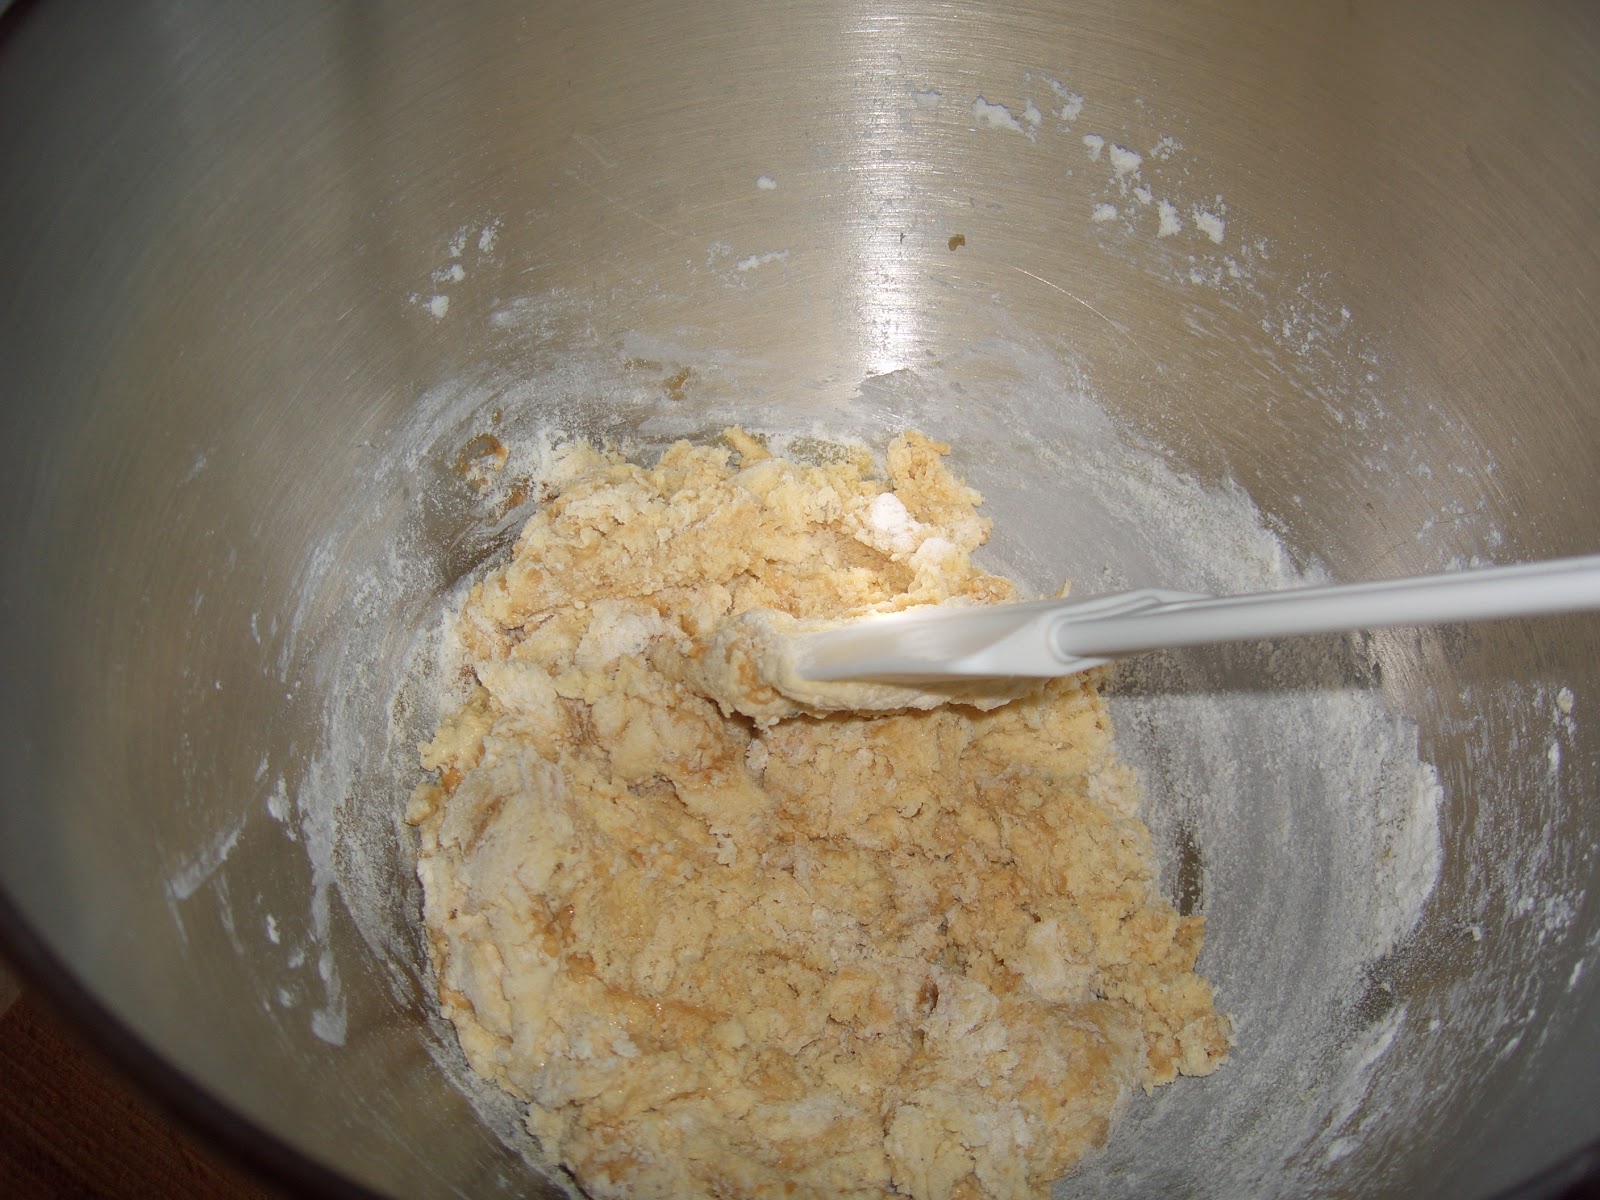
With a pinch of salt, whip up your eggs whites, until they are very solid, tough.
When it's done, add your two sugars mixed, tablespoon by tablespoon.
Then, you can pour herre your vanilla extract.

Step 3 :
Fill your piping bag with the beaten eggs whites.

Step 4 :
At this step, I was still very confident, sure of myself. My Xmas trees would be marvelous. I was imagining my mother telling me, with ecstasy : "Did you really bake this ? Dear, this is wonderful !".
And with modesty, I would have answer how much it was easy to make.
Never be too sure of yourself. Cooking God will punish you.
Well ... So, try to make some Xmas tree.
At this point, I realized my dreams failed.

With courage but no more faith, I used decorations.
At this point, no one could enter in the kitchen. I was a bear. Ready to eat everyone who could say a word : "What the Hell is this ?".
But my little family knows me and they don't ask until I find a solution.
Oh yes, sorry, I forgot ...
My daughter dared to tell me : "It looks like snowmen's pooh".
And she ran. Fast. VERY FAST.
And far ... VERY FAR ! RUN, Forrest, RUN !!
In the oven for 1 hour and 15 minutes. Then, stop the oven and let the meringues in for the night.
Step 5 :
The day after, whisk your heavy cream EXTRA COLD (very important point to succeed a Chantilly) and add one tablespoon of icing sugar.
Remember, it can take 10 minutes or so to see it becoming a real Chantilly.

Step 6 :
Pour the chestnut spread and stir slowly to incorporate he mixture.

That's it !

Step 7 :
Fill your wonderful (yes, because they are !) little meringues as macarons.
Finally, let them in the fridge for one hour.


Step 6 :
Pour the chestnut spread and stir slowly to incorporate he mixture.

That's it !

Step 7 :
Fill your wonderful (yes, because they are !) little meringues as macarons.
Finally, let them in the fridge for one hour.

Believe me, my guests just loved it !
Bon appétit !

I wish you to spend a good end of year !
Recapituative for 30 ruined tiny Christmas tree or 30 wonderful flat disc :
- 2 eggs whites
- 50 grammes of sugar
- 50 grammes of icing sugar
- One pinch of salt
- One vanilla pod (or one tablespoon of vanilla extract)
- Some decorations
- And a piping bag.
For the garniture, you'll need :
- 200 grammes of chestnut spread
- 30 cl of heavy cream extra cold
- One tablespoon of icing sugar.
Your oven must be preheated at 90°C (190°F / Th 3).
Open your vanilla pod and add the seeks to the two sugar. If you use vanilla extract, don't add it at this step.
With a pinch of salt, whip up your eggs whites, until they are very solid, tough.
When it's done, add your two sugars mixed, tablespoon by tablespoon.
Then, you can pour your vanilla extract.
Fill your piping bag with the beaten eggs whites.
Make some little discs and decorate them.
In the oven for 1 hour and 15 minutes. Then, stop the oven and let the meringues in for the night.
The day after, whisk your heavy cream EXTRA COLD and add one tablespoon of icing sugar.
Remember, it can take 10 minutes or so to see it becoming a real Chantilly.
Pour the chestnut spread and stir slowly to incorporate he mixture.
Fill your little meringues as macarons.
Finally, let them in the fridge for one hour.